
Are you ready to take on home repairs without the help of a professional? Tackling a home repair can seem overwhelming, but with the right tips and a bit of confidence, you can handle it like a pro. This guide will walk you through essential home repairs that you can do yourself, from fixing leaky faucets to cleaning gutters. By learning these skills, you’ll not only save money but also feel a sense of pride in maintaining your home.
Key Takeaways
- Fixing leaky faucets can save water and money.
- Regular gutter cleaning prevents water damage.
- Removing water stains keeps your ceilings looking fresh.
- Patching drywall is easier than it seems with the right tools.
- Replacing light fixtures can brighten up your space.
1. Fix Leaky Faucets
Leaky faucets can be both annoying and wasteful. This guide will walk you through identifying and repairing different leaky faucets, helping you restore peace to your kitchen and conserve water. Here’s how to tackle this common issue:
- Turn Off the Water Supply: Before you start, make sure to turn off the water supply to the faucet. You can usually do this by shutting off the valve under the sink.
- Disassemble the Faucet: Use a screwdriver or an Allen wrench to remove the handle of the faucet. This will give you access to the inner parts.
- Inspect the Components: Look for worn-out washers or O-rings, which are often the culprits behind leaks. If they look damaged, it’s time to replace them.
- Replace the Washer or O-Ring: Unscrew the old washer and replace it with a new one. For the O-ring, simply slide the new one into place.
- Reassemble the Faucet: Put everything back together in the reverse order. Be careful not to overtighten, as this can cause damage.
- Test for Leaks: Turn the water supply back on and check for any leaks. If it still leaks, you may need to consult a professional.
By following these steps, you can save both money and water. Remember, fixing leaky faucets is a simple task that can make a big difference in your home!
2. Clean Gutters

Cleaning your gutters is an important home maintenance task that can prevent serious damage to your home. If you can safely climb a ladder, you can do this yourself! Here’s how to tackle this job:
- Gather Your Tools: You’ll need a ladder, gloves, a trowel, and a bucket.
- Climb Up Safely: Make sure your ladder is stable and positioned correctly.
- Remove Debris: Use your trowel to scoop out leaves, twigs, and other gunk from the gutters.
- Check the Downspouts: Ensure they are clear of blockages to allow water to flow freely.
- Flush with Water: After cleaning, use a hose to flush out any remaining debris.
Cleaning your gutters regularly can help avoid costly repairs down the line.
Remember, maintaining your gutters is a simple way to protect your home from water damage and keep it looking great!
By keeping your gutters clean, you can ensure that rainwater flows away from your home, preventing leaks and water damage. This is especially important in areas prone to heavy rainfall.
| Task | Frequency |
|---|---|
| Clean Gutters | Twice a year |
| Inspect Downspouts | Twice a year |
| Flush with Water | After cleaning |
Regular maintenance is key to a healthy home, and cleaning your gutters is a great place to start!
3. Remove Water Stains
Water stains on your ceiling can be unsightly, but you don’t have to repaint the entire ceiling to fix them. Instead, you can try a simple cleaning method. Start by mixing a solution of water and 10% bleach in a spray bottle. Spray the stained area and let it sit for a day or two. If the stain is older, consider using a mildew remover from your local store. These methods usually work well on both flat and textured ceilings.
Steps to Remove Water Stains:
- Gather your materials: water, bleach, and a spray bottle.
- Mix the solution and spray it on the stain.
- Wait for 24-48 hours to see results.
Remember, if the stain persists, it might be a sign of a bigger issue, like a leak. Always check for underlying problems before proceeding.
If you notice that the stains are recurring, it may be time to consult a professional. Companies like ruach home services can help with water damage restoration and provide guidance on preventing future stains. Taking action early can save you from more extensive repairs later on!
4. Patch Drywall
Patching drywall is a skill that can save you time and money. To start, gather your tools: a putty knife, sandpaper, drywall compound, and a paintbrush. If the hole is large, you might need a piece of drywall or mesh patch. Here’s a simple step-by-step guide:
- Clean the area around the hole by removing any loose debris or paint chips.
- Apply a thin layer of drywall compound to fill the hole, smoothing it out with the putty knife.
- For larger holes, place a mesh patch over the hole before applying the compound.
- After applying the compound, let it dry as per the manufacturer’s instructions.
- Once dry, gently sand the area to create a smooth surface.
- Finally, paint over the patched area to match the wall color.
With practice, you’ll become skilled at patching holes in drywall, making your home look neat and well-maintained.
Remember, using mesh joint tape on the borders of the patch can help strengthen the repair and prevent future cracks. This technique is essential for achieving a professional finish!
5. Replace Light Fixtures
Replacing light fixtures can be a simple yet effective way to enhance the look of your home. A new light fixture can completely change the atmosphere of a room. Here are some steps to follow when replacing your light fixtures:
- Turn off the power to the existing fixture at the circuit breaker.
- Remove the old fixture by unscrewing it from the ceiling or wall.
- Connect the wires of the new fixture to the existing wires, matching colors (black to black, white to white, and green or copper to ground).
- Secure the new fixture in place and turn the power back on.
Safety First
Always ensure that the power is off before starting any electrical work. If you feel unsure, it’s best to consult a professional.
Choosing the Right Fixture
When selecting a new light fixture, consider the following:
- Style: Match it with your home decor.
- Size: Ensure it fits well in the space.
- Functionality: Think about the type of light you need (ambient, task, or accent).
Upgrading your light fixtures not only improves the look of your home but can also increase its value. Consider hiring professionals for complex installations.
Highlight
For those looking to remodel, Ruach Home Services offers a wide range of remodeling services, including professional installation for lighting and more.
6. Upgrade Outlet Covers
Upgrading outlet covers is a simple yet effective way to enhance the look of your home. New outlet covers can make a big difference in your room’s appearance. Here are some steps to follow when upgrading your outlet covers:
- Choose the Right Style: Decide on the style and color that matches your decor. You can find covers in various materials like plastic, metal, or even decorative designs.
- Gather Your Tools: You will need a screwdriver, a new outlet cover, and possibly a voltage tester to ensure safety.
- Turn Off Power: Before you start, make sure to turn off the power to the outlet at the circuit breaker to avoid any accidents.
- Remove the Old Cover: Use the screwdriver to take off the old cover. Keep the screws as you will need them for the new cover.
- Install the New Cover: Align the new cover with the outlet and secure it with the screws you saved.
Upgrading your outlet covers is a quick project that can refresh your space without breaking the bank. It’s a small change that can have a big impact on your home’s overall look.
By following these steps, you can easily upgrade your outlet covers and give your home a fresh feel. Remember, small changes can lead to big improvements in your living space!
7. Paint Touch-Ups
When it comes to refreshing your walls, paint touch-ups can make a big difference. Start by preparing the area: wrap any nearby hardware, baseboards, vents, or outlets with painter’s tape to keep them clean. This step is crucial for achieving clean lines and avoiding any accidental messes.
Next, choose the right paint. Make sure it matches the existing color and finish of your walls. If you’re unsure, test a small area first. Once you’re ready, pour the paint into a roller tray and load your roller or brush.
Here are some steps to follow for effective touch-ups:
- Clean the wall: Remove any dust or dirt to ensure the paint adheres well.
- Apply the paint: Use smooth, even strokes, starting from the top and working your way down.
- Assess coverage: After the first coat dries, check if you need a second coat for a professional finish.
Remember, taking your time with touch-ups can lead to a more polished look. Don’t rush the process!
8. Reseal Kitchen Countertops
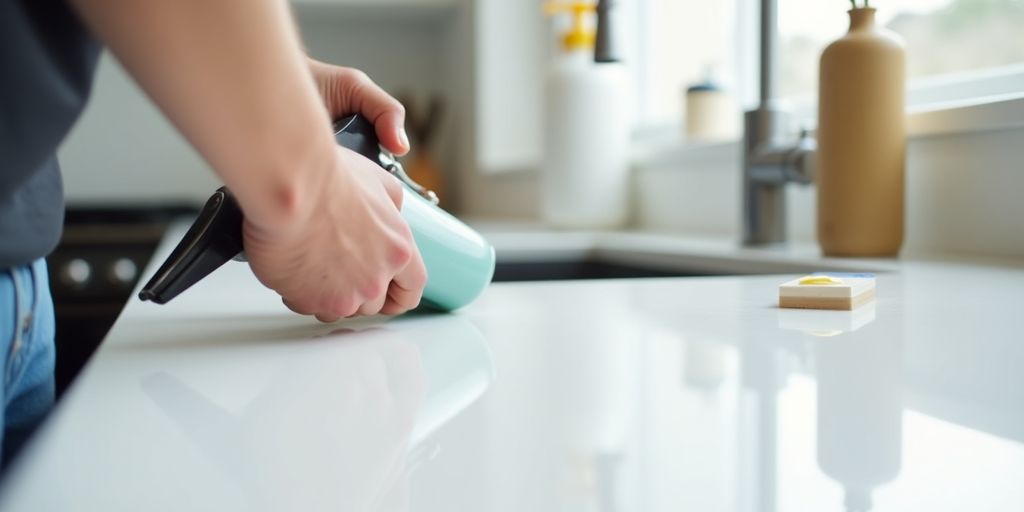
Resealing your kitchen countertops is a simple yet essential task that can help maintain their beauty and durability. By applying a sealant, you can protect your countertops from stains and water damage. Here’s how to do it:
- Clean the Surface: Start by thoroughly cleaning your countertops to remove any dirt or grime. Use a mild detergent and a soft cloth.
- Choose the Right Sealant: Select a sealant that is suitable for your countertop material, whether it’s granite, marble, or another type.
- Apply the Sealant: Using a clean cloth or sponge, apply a thin layer of sealant evenly across the surface. Make sure to cover all areas.
- Let it Dry: Allow the sealant to dry as per the manufacturer’s instructions, usually for about 24 hours.
- Buff the Surface: Once dry, buff the surface with a soft cloth to enhance its shine.
| Step | Action | Duration |
|---|---|---|
| 1 | Clean | 10 mins |
| 2 | Apply Sealant | 15 mins |
| 3 | Dry | 24 hours |
| 4 | Buff | 5 mins |
Resealing your countertops not only keeps them looking fresh but also extends their lifespan. It’s a small effort that yields great results!
Remember, regular maintenance is key to keeping your kitchen in top shape. By following these steps, you can ensure your countertops remain pristine and functional for years to come. Don’t forget to check your countertops every six months to see if they need resealing again!
9. Caulk Gaps
Caulking gaps is a simple yet effective way to improve your home’s energy efficiency. By sealing these gaps, you can prevent drafts and save on energy bills. Here’s how to do it:
- Identify the Gaps: Look for spaces around windows, doors, and baseboards.
- Choose the Right Caulk: Use silicone caulk for bathrooms and kitchens, and acrylic for indoor areas.
- Apply the Caulk: Cut the tip of the caulk tube at a 45-degree angle and apply it evenly into the gap.
- Smooth the Caulk: Use a wet finger or a caulk smoothing tool to create a clean finish.
- Let it Dry: Allow the caulk to cure as per the manufacturer’s instructions.
| Type of Caulk | Best Use | Drying Time |
|---|---|---|
| Silicone | Wet areas | 24 hours |
| Acrylic | Indoor | 1-2 hours |
| Polyurethane | Outdoor | 24 hours |
Sealing gaps not only enhances comfort but also protects your home from moisture damage.
Remember, fresh caulk can make a big difference in your home’s appearance and efficiency. If you need help, consider reaching out to professionals like Ruach Home Services, known for their expertise in home renovations and repairs.
10. Unclog Drains
Clogged drains can be a real headache, but with the right approach, you can handle it like a pro. Start by gathering your tools: a plunger and a drain snake are essential for this task.
Steps to Unclog a Drain
- Assess the situation: Is the water draining slowly or not at all? If it’s just slow, a plunger might do the trick.
- Use the plunger: Place it over the drain and pump vigorously to create suction. This can help dislodge any debris.
- If the clog persists, grab your drain snake. Insert it into the drain until you feel resistance, then rotate it while applying gentle pressure.
- Flush the drain: After clearing the clog, run hot water down the drain to wash away any leftover debris.
If you find yourself facing a stubborn clog, you might consider a chemical-free solution. You can combine baking soda with vinegar and boiling water for a powerful unclogging compound. This method is not only effective but also safe for your pipes.
Remember, regular maintenance is key! Pouring boiling water down your drains occasionally can help prevent future clogs.
By mastering these simple steps, you can keep your drains flowing smoothly and avoid costly repairs.
If your drains are clogged, don’t wait for the problem to get worse! Visit our website for quick tips and expert help to clear those stubborn blockages. Let us help you keep your home running smoothly!
Final Thoughts on DIY Home Repairs
In conclusion, taking on home repairs by yourself can be a great way to save money and feel proud of your work. By learning the basic skills needed for common repairs, you can tackle issues like leaky faucets or clogged drains with confidence. Remember, every time you fix something, you’re not just making your home better; you’re also growing your own skills. So, don’t hesitate to dive in and start your DIY journey. If you ever feel stuck or unsure, it’s okay to ask for help. With practice and patience, you’ll become the handy person your home needs!
Frequently Asked Questions
What are some simple home repairs I can do myself?
You can fix leaky faucets, clean gutters, patch drywall, and do paint touch-ups.
How can I save money on home repairs?
By doing simple repairs yourself, you can avoid paying for professional services.
When should I call a professional for repairs?
If a repair is too complex, like electrical work or plumbing issues, it’s best to hire an expert.
What tools do I need for basic home repairs?
Basic tools include a wrench, screwdrivers, pliers, a ladder, and a caulk gun.
How do I know if a project is too big for me to handle?
If the project seems dangerous or requires special skills, it’s better to call a professional.
Can I learn how to do these repairs online?
Yes! There are many online tutorials and videos that can teach you how to do basic home repairs.