
Owning a home means dealing with repairs, whether they’re big or small. Sometimes, it’s a leaky faucet or a clogged drain; other times, it’s something more complex like a broken circuit. Knowing how to handle these issues not only saves money but also gives you a sense of accomplishment. In this guide, we’ll walk you through some of the most common home repair tasks, providing you with the knowledge to tackle them head-on.
Key Takeaways
- Understanding the basics of plumbing and electrical systems can prevent costly repairs.
- Regular maintenance of your home’s exterior can prolong its lifespan and keep it looking sharp.
- Knowing how to fix common flooring issues can save you from replacing entire sections.
- Wall and ceiling repairs are manageable with the right tools and techniques.
- Keeping your heating and cooling systems in check ensures a comfortable home year-round.
Mastering Basic Plumbing Repairs
Fixing Leaky Faucets
Leaky faucets are more than just an annoyance; they can waste a surprising amount of water over time. A single dripping faucet can waste up to 5 gallons a day. To fix this, first turn off the water supply. Then, remove the handle and unscrew the packing nut. Once inside, you’ll typically find a washer or O-ring that needs replacing. Reassemble everything and turn the water back on to check your handiwork.
Unclogging Drains Effectively
Clogged drains are a common household issue, but they don’t always require a plumber. Start by removing any visible debris from the drain. If it’s still clogged, try using a plunger or a drain snake. For stubborn clogs, a mixture of baking soda and vinegar can do wonders. Pour half a cup of baking soda followed by half a cup of vinegar down the drain, let it fizz for a few minutes, and then flush with hot water.
Replacing Toilet Components
Toilets are made up of several components that can wear out over time, such as the flapper, fill valve, or flush valve. If your toilet is running continuously or not flushing properly, these parts may need to be replaced. Begin by turning off the water supply and flushing the toilet to empty the tank. Remove the old components and install new ones, ensuring everything is tightened securely. Turn the water back on and test the toilet to ensure it’s working correctly.
Regular maintenance and knowing how to tackle these basic plumbing issues can save you from costly repairs down the line. It’s empowering to handle these tasks on your own, and it’s a great way to familiarize yourself with your home’s plumbing system.
New homeowners should remember to locate their main water shut-off valve to prevent potential water damage during repairs.
Essential Electrical Fixes for Homeowners
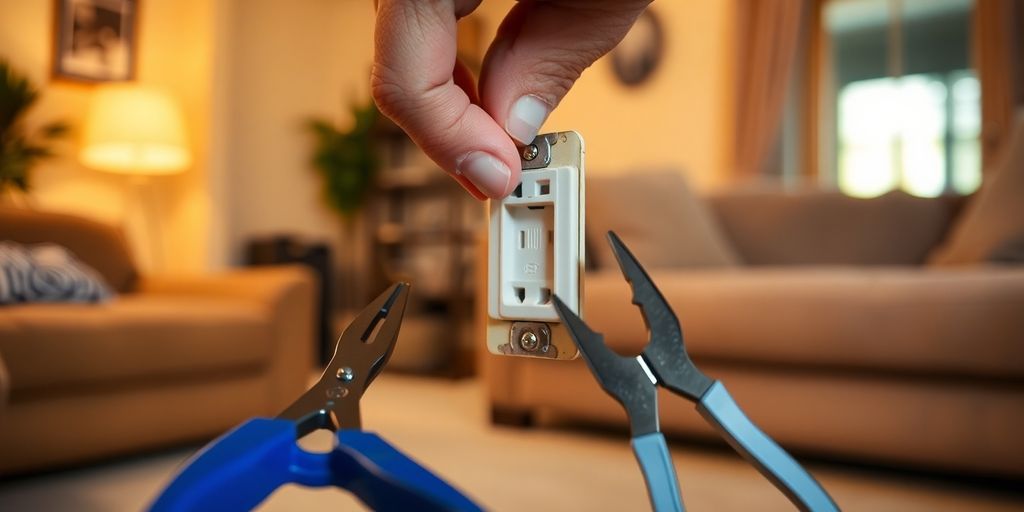
Understanding Circuit Breakers
Circuit breakers are the unsung heroes of your home’s electrical system. They keep everything running smoothly by cutting off power if something’s wrong. Knowing how to reset a tripped breaker can save you from unnecessary headaches. Here’s a quick guide:
- Locate the Breaker Box: Usually found in basements, garages, or utility rooms.
- Identify the Tripped Breaker: Look for a switch that’s not aligned with the others.
- Reset the Breaker: Flip it to the "off" position, then back to "on".
If a breaker keeps tripping, it might be time to call in a pro to check things out.
Installing Light Fixtures Safely
Changing a light fixture might seem daunting, but with a bit of care, it’s manageable. Safety is key here, so always turn off the power at the breaker before starting. Here’s how you can do it:
- Turn Off the Power: Use a voltage tester to ensure the power’s off.
- Remove the Old Fixture: Unscrew and disconnect the wires.
- Connect the New Fixture: Match the wires (black to black, white to white, and green or copper to ground).
- Secure the Fixture: Screw it in place and turn the power back on.
Remember, if you’re unsure about any step, don’t hesitate to consult an electrician.
Troubleshooting Common Electrical Issues
Electrical problems can be tricky, but some are simple enough to handle on your own. Here are a few common issues and how to tackle them:
- Flickering Lights: Often caused by loose bulbs or connections. Tighten the bulb or check the fixture.
- Dead Outlets: Could be a tripped breaker or a blown fuse. Reset the breaker or replace the fuse.
- Sparking Outlets: This one’s serious. Unplug everything and call an electrician immediately.
"Electrical repairs can be intimidating, but with some basic knowledge, you can handle minor issues safely and effectively."
For more complex problems or if you ever feel out of your depth, it’s wise to reach out to professionals like Ruach Home Services who can ensure the job is done right.
Maintaining Your Home’s Exterior
Repairing Damaged Siding
Keeping your home’s siding in good shape isn’t just about looks. It’s about protecting your home from the elements. If your siding is cracked or peeling, it might be time to fix it up. Here’s what you can do:
- Inspect Regularly: Look for any signs of damage, like cracks or warping. These can let moisture in, and that’s bad news.
- Patch Small Areas: For minor damage, you can patch it up yourself. Use a matching siding patch kit to cover small holes or cracks.
- Consider Replacement: If the damage is extensive, replacing the siding might be the best option. This can prevent further issues down the line.
Maintaining your siding not only boosts your curb appeal but also helps in keeping your home energy-efficient.
Sealing Windows and Doors
Drafty windows and doors can really mess with your heating and cooling bills. Sealing them up is a simple way to save energy and keep your home cozy.
- Check for Drafts: On a windy day, feel around the edges of your windows and doors for any drafts.
- Use Caulking or Weather Stripping: Seal any gaps you find with caulking or weather stripping. This is a quick fix that can make a big difference.
- Inspect Annually: Make it a habit to check your seals every year. Over time, they can wear out and need replacing.
Cleaning and Fixing Gutters
Your gutters play a crucial role in protecting your home from water damage. Keeping them clean and in good repair is essential.
- Regular Cleaning: Clean your gutters at least twice a year, or more often if you have a lot of trees around. Leaves and debris can clog them up and cause water to overflow.
- Check for Leaks: After cleaning, run some water through the gutters to check for leaks or sagging spots.
- Repair as Needed: Fix any leaks with gutter sealant and secure any loose sections.
Regular gutter maintenance can prevent costly repairs to your home’s foundation and roof.
Flooring Repairs and Maintenance
When it comes to keeping your floors looking their best, a little maintenance goes a long way. Whether you’re dealing with hardwood, tile, or carpet, understanding how to tackle common issues can save you both time and money.
Replacing Damaged Floorboards
Replacing a damaged floorboard might sound intimidating, but with a few tools and some patience, you can do it yourself. Here’s a simple guide to help you:
- Identify the damaged board: Look for cracks, warping, or discoloration.
- Remove the damaged board: Carefully cut along the seams and lift it out.
- Install the new board: Make sure it fits snugly before securing it in place.
Keeping a few spare boards from your original installation can make this process smoother.
Repairing Tile and Grout
Tiles are durable, but they can crack or the grout can wear away over time. Here’s how to fix these issues:
- Cracked Tiles: Remove the broken tile by chipping away the grout and gently lifting the tile. Apply new adhesive and set the replacement tile in place.
- Worn Grout: Use a grout saw to remove the old grout, then apply new grout with a rubber float, making sure to wipe away the excess with a damp sponge.
Regularly sealing your tiles can help prevent future damage.
Maintaining Carpets and Rugs
Carpets and rugs need regular care to stay fresh. Here’s what you can do:
- Vacuum regularly: This helps remove dirt and debris that can wear down fibers.
- Spot clean spills immediately: Blot the area with a clean cloth and use a carpet cleaner if necessary.
- Rotate rugs: This ensures even wear and extends their life.
Regular maintenance not only keeps your floors looking great but also extends their lifespan. Taking the time to address small issues promptly can prevent them from becoming larger, more expensive problems.
For expert help, consider consulting with professional flooring services to ensure your floors are installed and maintained correctly.
Wall and Ceiling Repair Techniques
Patching Drywall Holes
Patching drywall holes might seem daunting, but with a bit of patience, you can do it yourself. Start by cleaning the area around the hole. Use sandpaper to smooth out any rough edges. Then, cut a piece of drywall that fits the hole snugly. Secure it with drywall tape and apply joint compound over the tape. Let it dry, sand it smooth, and apply another layer if necessary. Finish with a coat of paint to match the wall.
Fixing Cracks in Ceilings
Cracks in ceilings can be tricky, but they’re often just cosmetic. First, use a utility knife to widen the crack slightly, which helps the joint compound adhere better. Apply a thin layer of joint compound, place mesh tape over the crack, and cover it with another layer of compound. After it dries, sand it gently and apply a final coat. This technique ensures a seamless finish.
Removing and Replacing Wallpaper
Removing old wallpaper is a task that requires some elbow grease. Start by scoring the wallpaper with a utility knife. Then, use a mixture of warm water and vinegar to soak the paper, making it easier to peel off. Use a scraper to remove stubborn sections. Once the old wallpaper is off, clean the walls thoroughly before applying new wallpaper. When hanging new wallpaper, work from the top down, smoothing out air bubbles as you go.
Taking on wall and ceiling repairs yourself can be rewarding. You learn new skills and gain confidence in maintaining your home.
Heating and Cooling System Maintenance
Cleaning Air Ducts
Keeping your air ducts clean is vital for maintaining good air quality in your home. Over time, dust and debris can accumulate, leading to potential health issues and reducing the efficiency of your HVAC system. Here’s a simple process to help you keep those ducts in check:
- Turn off your HVAC system before starting any cleaning.
- Remove and clean vent covers with warm soapy water.
- Use a vacuum cleaner with a long hose attachment to reach into the ducts as far as possible.
- Consider using a brush to dislodge any stubborn dust or debris.
- Replace vent covers and turn your system back on.
Regular cleaning not only improves air quality but also boosts system efficiency, saving you money on energy bills.
Replacing HVAC Filters
One of the simplest yet most effective ways to maintain your heating and cooling system is by regularly replacing the air filters. A clogged filter can strain your system, leading to higher energy costs and potential damage. Here’s how you can do it:
- Identify the right filter size for your system. Check the old filter or your system’s manual.
- Turn off the HVAC unit before removing the old filter.
- Insert the new filter, ensuring the arrows on the side align with the airflow direction.
- Set a reminder to change the filter every 1-3 months, depending on usage and air quality.
Troubleshooting Thermostat Issues
A malfunctioning thermostat can wreak havoc on your home’s comfort levels. If your system isn’t heating or cooling properly, the thermostat should be your first checkpoint. Here are some troubleshooting tips:
- Check the power source: Ensure the thermostat is receiving power, whether it’s battery-operated or wired.
- Verify the settings: Make sure the mode is set correctly (heat or cool) and the temperature is set to your desired level.
- Clean the thermostat: Dust and dirt can interfere with its operation. Gently clean it with a soft brush or cloth.
- If problems persist, it might be time to seek professional help from America’s Home Services in Bowie, who offer expert HVAC maintenance and solutions.
Keeping your heating and cooling systems in top shape doesn’t have to be complicated. With regular maintenance and a few DIY tricks, you can ensure your home stays comfortable year-round.
DIY Pest Control and Prevention

Identifying Common Household Pests
Let’s face it, pests are everywhere, and each type brings its own set of challenges. Ants, for instance, might invade your kitchen in search of food. Rodents, like mice and rats, are not only a nuisance but can also cause structural damage. Then there are termites, which are notorious for silently chewing through wood, potentially leading to costly repairs. Cockroaches, on the other hand, are not just creepy; they can spread disease. Knowing what you’re up against is the first step in tackling these issues.
Natural Pest Control Methods
If you’re not keen on using chemicals, there are plenty of natural ways to keep pests at bay:
- Vinegar and Water: A mix can deter ants. Spray it around entry points.
- Essential Oils: Peppermint oil works wonders against spiders. A few drops around windows and doors can do the trick.
- Boric Acid: For cockroaches, sprinkle a little in areas they frequent.
These methods are not only eco-friendly but also safe for pets and kids.
When to Call a Professional Exterminator
Sometimes, the DIY approach just won’t cut it. If you find yourself overwhelmed by an infestation, it might be time to call in the pros. A professional can provide a thorough inspection and implement a targeted treatment plan. Plus, they have access to tools and products that aren’t available to the average homeowner.
Don’t wait too long to seek help. A small pest problem can quickly escalate into a bigger issue if not addressed promptly. If you’re dealing with persistent mold issues as well, consider professional mold remediation to ensure your home remains a safe and healthy environment.
Energy Efficiency Improvements
Improving your home’s energy efficiency isn’t just about saving money—it’s about making your living space more comfortable and sustainable. Here are some practical steps you can take:
Insulating Your Home Properly
Insulation is key to maintaining a consistent temperature in your home. Whether it’s the attic, walls, or floors, proper insulation can significantly reduce energy loss. Consider using spray foam or fiberglass, depending on your needs and budget. A well-insulated home can cut heating and cooling costs by up to 20%.
- Check for drafts around windows and doors.
- Install weather stripping or caulk to seal gaps.
- Consider adding insulation to your attic or basement.
Upgrading to Energy-Efficient Appliances
Switching to energy-efficient appliances can make a big difference in your utility bills. Look for the ENERGY STAR label when purchasing new appliances. These products meet strict energy efficiency guidelines set by the U.S. Environmental Protection Agency.
- Replace old refrigerators and dishwashers with energy-efficient models.
- Consider a tankless water heater for more efficient hot water supply.
- Use LED bulbs instead of traditional incandescent ones.
Sealing Air Leaks
Air leaks can lead to significant energy loss, making your heating and cooling systems work harder. Identifying and sealing these leaks can improve your home’s energy efficiency.
- Use caulking around windows and doors.
- Seal leaks in ductwork with mastic or metal tape.
- Install door sweeps to prevent drafts.
"Taking small steps to improve energy efficiency can lead to big savings over time, not just in your wallet but also for the environment."
Additionally, proper landscaping around your home can enhance energy efficiency. Planting trees strategically can provide shade in summer and act as windbreaks in winter, further reducing energy costs.
Improving energy efficiency in your home is a smart choice that can save you money and help the environment. Simple changes like using energy-saving light bulbs or sealing windows can make a big difference. Want to learn more about how to make your home more efficient? Visit our website for tips and expert advice!
Wrapping It Up
So there you have it, folks. Home repair might seem like a mountain at first, but with a little patience and the right tools, it’s more like a hill. Whether you’re fixing a leaky faucet or tackling a bigger project like remodeling your kitchen, remember that every bit of effort you put in adds value to your home. Plus, there’s a certain satisfaction in knowing you did it yourself. Sure, there might be a few bumps along the way, but that’s all part of the learning curve. Keep this guide handy, and you’ll be ready to face whatever your house throws at you next. Happy fixing!
Frequently Asked Questions
How can I stop a faucet from dripping?
To fix a dripping faucet, start by turning off the water supply. Then, remove the handle and replace worn-out washers or seals. This should stop the leak.
What should I do if my drain is clogged?
Try using a plunger or a drain snake to clear the blockage. If that doesn’t work, a mixture of baking soda and vinegar might help.
How do I fix a running toilet?
A running toilet is often caused by a faulty flapper. Check if the flapper is sealing properly, and replace it if necessary.
What is the best way to clean air ducts?
To clean air ducts, switch off the HVAC system, remove vent covers, and use a vacuum with a hose attachment to clean inside the ducts.
When should I replace my HVAC filter?
It’s best to replace your HVAC filter every 1 to 3 months, depending on usage and the type of filter you have.
How can I make my home more energy-efficient?
Seal any air leaks around windows and doors, add insulation where needed, and consider upgrading to energy-efficient appliances.