
Dealing with water damage in your home can be a real headache. Whether it’s from a burst pipe or a heavy rainstorm, the aftermath isn’t pretty. Water damage rebuilds are not just about mopping up the mess; it’s about making sure your home is safe and sound for the long haul. This guide will walk you through the steps to take after water damage hits, helping you get back on track without missing a beat.
Key Takeaways
- Always start with a safety check before diving into repairs.
- Document everything for insurance purposes; it’ll make claims easier.
- Get rid of all the water and dry out the area completely to avoid mold.
- Use the right cleaning agents to disinfect affected areas thoroughly.
- Plan for future prevention to keep water damage at bay.
Understanding Water Damage Rebuild
Types of Water Damage
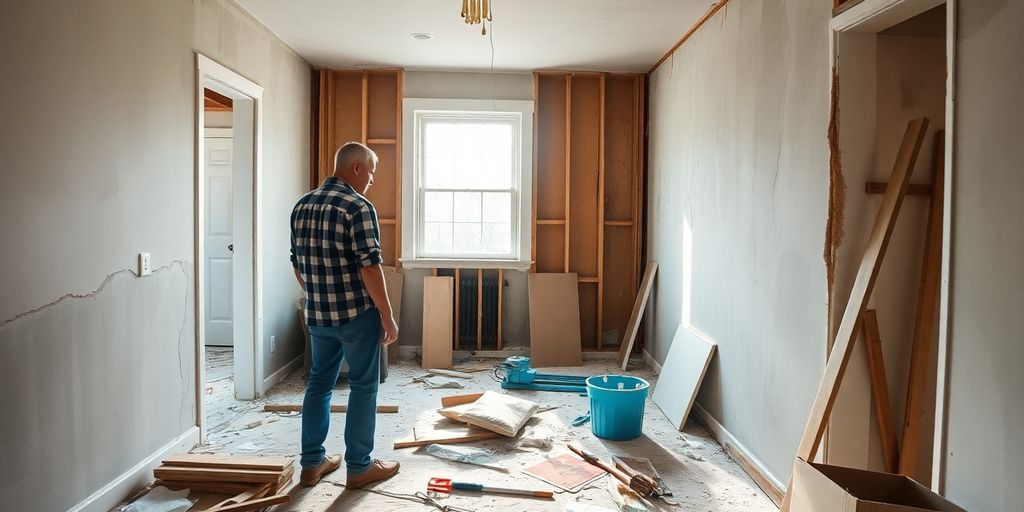
Water damage isn’t just about puddles on the floor. It can be sneaky and varied. There are three main types to watch out for:
- Clean Water Damage: This is the least harmful type. It comes from sources like rain or broken pipes. It’s not contaminated, but it can still cause trouble if ignored.
- Gray Water Damage: This type is slightly contaminated. Think of it as water from your washing machine or dishwasher. It’s not drinkable, and it can cause discomfort or illness if mishandled.
- Black Water Damage: This is the worst kind. It’s highly contaminated, often from sewage or serious flooding. It poses significant health risks and requires immediate professional attention.
Common Causes of Water Damage
Water damage can sneak up on you from various sources. Here are some usual suspects:
- Leaking Pipes: Whether it’s a slow drip or a sudden burst, leaking pipes are a common cause.
- Faulty Appliances: Washing machines, dishwashers, and water heaters can all malfunction, leading to unwanted water.
- Natural Disasters: Heavy rains, hurricanes, and floods can bring in a lot of water quickly, overwhelming your home.
Impact on Home Structure
Water damage isn’t just about wet carpets. It can seriously mess with your home’s structure. Here’s how:
- Foundation Issues: Water can seep into the foundation, causing cracks and instability.
- Mold Growth: Damp areas are a breeding ground for mold, which can spread quickly and damage walls and floors.
- Electrical Hazards: Water and electricity don’t mix. Damaged wiring can lead to dangerous situations.
When dealing with water damage, acting fast is key. The longer water sits, the more damage it can do. If you’re facing water issues, consider addressing water damage promptly to prevent further complications.
Initial Assessment and Safety Measures
Evaluating Structural Integrity
Before diving into any repairs, it’s critical to evaluate the structural integrity of your home. This means checking for any visible damage to walls, ceilings, and floors. Look for signs like cracks, warping, or any unusual shifts in the structure. Use a flashlight to inspect hard-to-see areas, and don’t forget to check the foundation for any water pooling that might indicate deeper issues.
- Inspect walls and ceilings for discoloration or bulging.
- Check floors for warping or buckling.
- Examine the foundation for water pooling or cracks.
Ensuring Electrical Safety
Water and electricity are a dangerous mix. To ensure electrical safety, turn off the power in affected areas immediately. This step is non-negotiable to prevent electrical shocks or fires. If you’re unsure about handling this, call a professional electrician to assess and safely manage the situation.
- Turn off power at the main breaker.
- Avoid using electrical appliances in wet areas.
- Have a professional check wiring and outlets.
Identifying Health Hazards
Standing water and damp environments can be breeding grounds for mold and bacteria. Identifying these health hazards early can prevent long-term health issues. Use protective gear like gloves and masks when inspecting affected areas. If you notice a musty smell or visible mold, it’s time to take action.
- Wear protective gear such as gloves and masks.
- Look for mold growth, especially in damp corners.
- Be aware of any unusual odors indicating mold or mildew.
Taking these initial assessment and safety measures seriously can save you from bigger headaches down the line. It’s not just about fixing the damage; it’s about ensuring your home remains a safe place for you and your family.
For a more detailed understanding of the water damage assessment process, including documenting damage through photographs and taking moisture level readings, check out our comprehensive water damage assessment guide.
Water Removal and Drying Techniques
Effective Water Extraction Methods
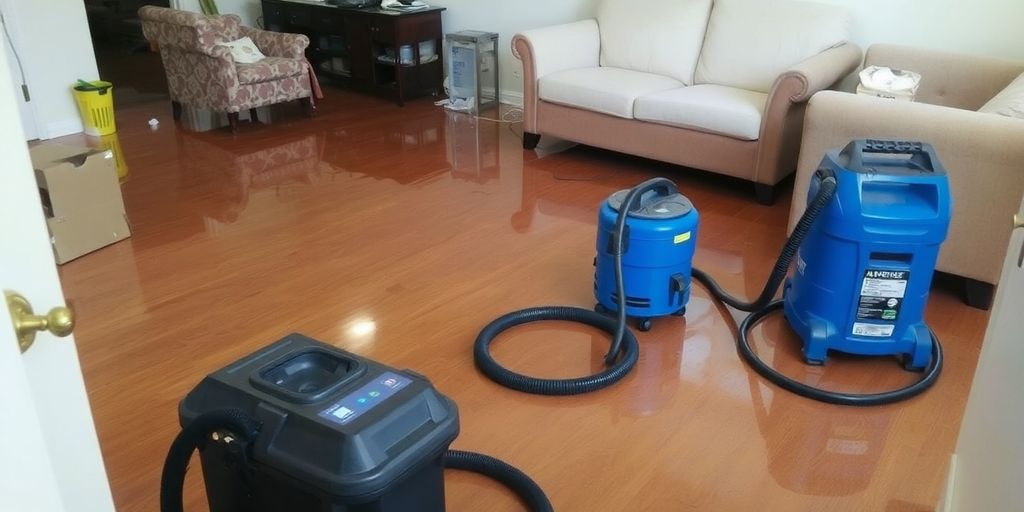
When dealing with water damage, the first step is to get rid of the water as quickly as possible. Effective water extraction involves using the right tools for the job. Start with wet vacuums and pumps to remove standing water. If the situation is severe, you might need to call in professionals who have access to more advanced equipment. Once the bulk of the water is gone, it’s important to tackle any residual moisture with portable wet/dry vacuums. These tools can help ensure that surface water is thoroughly removed.
Using Dehumidifiers and Fans
After extracting the water, the next step is to dry out the area. Dehumidifiers and fans are your best friends here. Position them strategically to maximize airflow. This helps to pull moisture out of the air and off surfaces. If possible, open windows and doors to let fresh air circulate. This process can take a while, especially if the damage is extensive. Remember, the goal is to prevent mold, so be patient and thorough.
Monitoring Moisture Levels
Keeping an eye on moisture levels is crucial to ensure that everything is truly dry. Use a hygrometer to measure the humidity in the affected areas. Regular checks can help prevent future problems. Move furniture and other items to allow air to circulate freely. Monitoring ensures that you don’t miss any hidden moisture pockets that could lead to mold growth later on.
To effectively dry out a water-damaged building, prioritize safety precautions, create a plan, and document the damage. Remove bulk water and prevent further water entry, and address waterlogged materials promptly. Learn more about drying techniques.
Cleaning and Disinfecting Affected Areas
Choosing the Right Cleaning Agents
When dealing with water damage, selecting the right cleaning agents is key. Disinfectants like bleach and ammonia are commonly used to kill bacteria and mold spores. However, it’s important to never mix these chemicals due to the risk of toxic fumes. For those with sensitivities, consider using natural alternatives, such as vinegar or hydrogen peroxide, which can be effective against germs without the harshness of industrial chemicals. Always test a small area first to ensure no adverse reactions on surfaces.
Disinfecting Surfaces and Belongings
Once the cleaning agents are chosen, it’s time to tackle the surfaces and belongings. Start by wiping down hard surfaces with disinfectant wipes or solutions. For porous items like upholstered furniture, use a fabric cleaner and ensure thorough drying to prevent mold.
- Hard Surfaces: Use a bleach solution or commercial disinfectant.
- Soft Furnishings: Apply a suitable fabric cleaner and dry completely.
- Carpets: Extract excess water, clean with a carpet cleaner, and dry thoroughly.
Always wear protective gear, such as gloves and masks, to avoid direct contact with contaminants.
Handling Contaminated Materials
Contaminated materials pose health risks and need careful handling. Items like soaked carpets, drywall, and insulation often cannot be salvaged. These should be removed and disposed of properly to prevent mold and bacteria growth.
- Identify Non-Salvageable Items: Look for signs of severe water damage or mold.
- Remove and Dispose: Safely remove items and use appropriate disposal methods.
- Consult Professionals: If unsure, consider consulting a professional service to assess what can be saved.
It’s crucial to act quickly and efficiently during the cleaning and disinfecting stage to prevent further damage and ensure a safe living environment.
Repairing and Restoring Your Home
Replacing Damaged Drywall and Insulation
When water seeps into your home, it doesn’t just wet the walls; it can destroy them. Drywall and insulation are particularly vulnerable. If they’ve been soaked, they need replacing to prevent mold. Start by cutting out the damaged sections of drywall. Measure and cut new pieces to fit the gaps, then screw them into place. Replace any wet insulation behind the drywall. It’s a bit of a messy job but necessary for a safe home.
Flooring and Carpentry Repairs
Waterlogged floors are a headache. Depending on the material—be it hardwood, carpet, or tile—you might need to rip it all out. For hardwood, check for warping and buckling. Carpets can harbor mold, so they often need replacing. Even tile floors might have water damage underneath. Once removed, ensure the subfloor is dry before laying new material. Carpentry repairs might also be needed if water has damaged baseboards or door frames.
Ensuring HVAC and Electrical Systems are Safe
Water and electricity don’t mix. After a flood, get a professional to check your HVAC and electrical systems. They’ll ensure everything is safe and working properly. This step is crucial because hidden water damage can lead to bigger problems down the road. Consider installing water sensors to catch leaks early and prevent future issues.
Preventing Future Water Damage
Installing Sump Pumps and Backflow Valves
First up, let’s talk about sump pumps and backflow valves. These gadgets can be lifesavers, especially if your home sits in a low-lying area. Sump pumps help keep your basement dry by pumping out water that collects in a sump basin. It’s kind of like having a personal water bouncer. Meanwhile, backflow valves stop sewage from backing up into your home during heavy rains. Installing these might sound like a hassle, but trust me, it’s better than dealing with a flooded basement.
Improving Home Drainage Systems
Next, let’s get into drainage. Ever notice water pooling around your home after a rainstorm? That’s a sign your drainage system might need a little TLC. Start by checking your gutters and downspouts. They should be clear of leaves and debris to direct water away from your house. You might also want to consider grading your yard so water naturally flows away from your foundation. It’s all about keeping water where it belongs—outside, not in.
Regular Maintenance and Inspections
Finally, regular maintenance is your best friend against water damage. Make it a habit to inspect your home for leaks and fix them as soon as you spot them. Look for signs of moisture in places like the attic or under sinks. Water alarms can also be super handy; they alert you to leaks early on, so you can nip problems in the bud. And don’t forget to review your emergency plan. Make sure everyone in the house knows where the shut-off valves are and keep emergency contacts, like a reliable water damage restoration service, close by.
Keeping water out of your home isn’t just about quick fixes. It’s about being proactive and staying on top of maintenance. A little effort now can save you a lot of trouble down the road.
To keep your home safe from future water damage, it’s important to take some simple steps. Start by checking for leaks in your pipes and fixing them right away. Make sure your gutters are clean and direct water away from your house. If you notice any signs of water damage, like stains or mold, act quickly to address the issue. For more tips and professional help, visit our website today!
Conclusion
Wrapping up a water damage rebuild can feel like a huge relief. You’ve tackled a big challenge, and now your home is on its way back to being the cozy place you love. Remember, the key is to act fast and follow the steps carefully. From making sure everything’s safe, to drying out and cleaning up, each step is important. Don’t forget to keep an eye out for mold and get professional help when needed. By staying on top of things, you can make sure your home stays safe and sound for the long haul. So, take a deep breath, and know that with the right approach, you’ve got this!
Frequently Asked Questions
What should I do first if my home has water damage?
First, ensure safety by turning off the electricity and water supply. Then, remove any valuables and furniture from the affected area to prevent further damage.
How quickly does mold start to grow after water damage?
Mold can begin to grow within 24 to 48 hours after water exposure, so it’s important to start drying out the area as soon as possible.
Can I handle water damage repairs myself?
For small amounts of water, you might manage on your own. However, for significant water damage, it’s best to hire professionals who have the right tools and experience.
Does homeowners insurance cover water damage?
It depends on your policy and the cause of the damage. Sudden incidents like burst pipes are usually covered, but gradual leaks might not be. Check with your insurance provider for details.
What are the risks of not addressing water damage promptly?
Ignoring water damage can lead to structural issues, mold growth, and health problems. It’s crucial to address it quickly to avoid these complications.
How can I prevent future water damage in my home?
Install sump pumps and backflow valves, improve drainage around your home, and perform regular maintenance checks to catch potential problems early.