
So, you’re looking at some home damage and thinking, “Where do I even start?” Trust me, you’re not alone. Home damage repair can seem daunting, but with the right guidance, it’s totally doable. This guide is here to walk you through the basics, from fixing water damage to keeping your roof in check. We’ll also dive into some handy DIY tips and preventative measures to keep your home in tip-top shape. Whether you’re a newbie or a seasoned pro, there’s something here for everyone. Let’s get started on making your home the best it can be!
Key Takeaways
- Start with the basics: Understand the common types of home damage and the tools you’ll need.
- Safety first: Always prioritize safety when tackling any repair job.
- Water damage? Act fast to prevent mold and further issues.
- Don’t ignore the roof: Regular inspections can save you from huge headaches.
- Preventative maintenance is key: Regular check-ups can save time and money in the long run.
Understanding the Basics of Home Damage Repair
Identifying Common Types of Home Damage
When it comes to home damage, it’s not just about the big disasters like fires or floods. Everyday wear and tear can also take a toll. Here’s a quick look at some of the usual suspects:
- Water Damage: Leaky roofs, burst pipes, or even a forgotten running faucet can lead to this. It’s not just the water you see; it’s about what gets soaked underneath.
- Structural Damage: This can be anything from cracks in your walls to issues with your foundation. Often, these are the ones you don’t see until they become a bigger problem.
- Electrical Issues: Flickering lights or outlets that don’t work can indicate wiring problems.
Understanding these common types can help you spot issues early, saving you from hefty repair bills later.
Essential Tools for Home Repair
Having the right tools at your disposal makes all the difference in tackling home repairs. Here’s what you’ll want in your toolkit:
- Hammer: For all those nails and small demolition tasks.
- Screwdrivers: Both flathead and Phillips for a variety of screws.
- Tape Measure: Essential for any project that involves measuring.
- Utility Knife: Handy for cutting through materials like drywall or carpet.
- Pliers: Useful for gripping, twisting, and pulling.
With these tools, you’re more than halfway to fixing most minor home issues.
Safety Precautions During Repair
Safety should always come first when doing any repair work at home. Here are some basic precautions:
- Wear Protective Gear: Gloves, goggles, and masks can prevent injuries.
- Turn Off Utilities: Before working on electrical or plumbing issues, make sure the power or water is off.
- Use Ladders Safely: Always ensure the ladder is on stable ground and don’t overreach.
Taking time to prepare and protect yourself can mean the difference between a successful repair and a trip to the emergency room.
By understanding these basics, you set a solid foundation for any repair task. Remember, identifying problems early and having the right tools on hand can save you a lot of trouble down the road. And always, safety first!
Step-by-Step Guide to Repairing Water Damage
Immediate Actions to Take After Water Damage
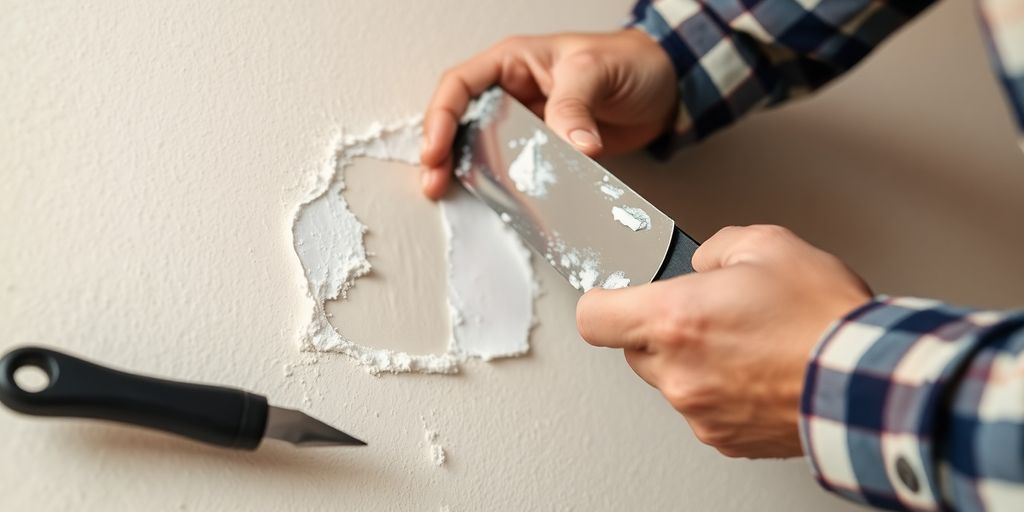
When water unexpectedly invades your home, quick action is crucial. First, find and stop the source of water. Whether it’s a burst pipe or a leaky roof, shutting off the main water supply can prevent further flooding. Next, remove any standing water using a wet/dry vacuum, mops, or towels. If the water level is significant, consider calling professionals for help. Document the damage thoroughly with photos and videos for insurance purposes.
Repairing Water-Damaged Walls and Floors
Once the immediate threat is managed, it’s time to assess the damage to your walls and floors. Start by removing any wet drywall at least 12 inches above the water line. This helps prevent mold growth. For floors, pull up any soaked carpets or vinyl flooring. Allow the subfloor to dry completely before installing new materials. If you’re dealing with hardwood floors, check for signs of warping or mold. Replace any damaged sections to maintain the integrity of your home.
Preventing Mold Growth After Water Damage
Mold is a common aftermath of water damage, and preventing its growth is essential for a healthy home. Ensure that all affected areas are thoroughly dried. Use fans, dehumidifiers, and open windows to improve air circulation. Regularly monitor moisture levels and inspect for mold signs. If mold is detected, it’s best to handle it immediately with appropriate cleaning agents or seek professional help to ensure it’s completely removed.
Water damage can be overwhelming, but addressing it swiftly can save you from future headaches. Remember, the longer water sits, the more damage it can cause. Stay vigilant and proactive in your repair efforts.
Effective Strategies for Roof and Gutter Maintenance
Inspecting and Repairing Roof Shingles
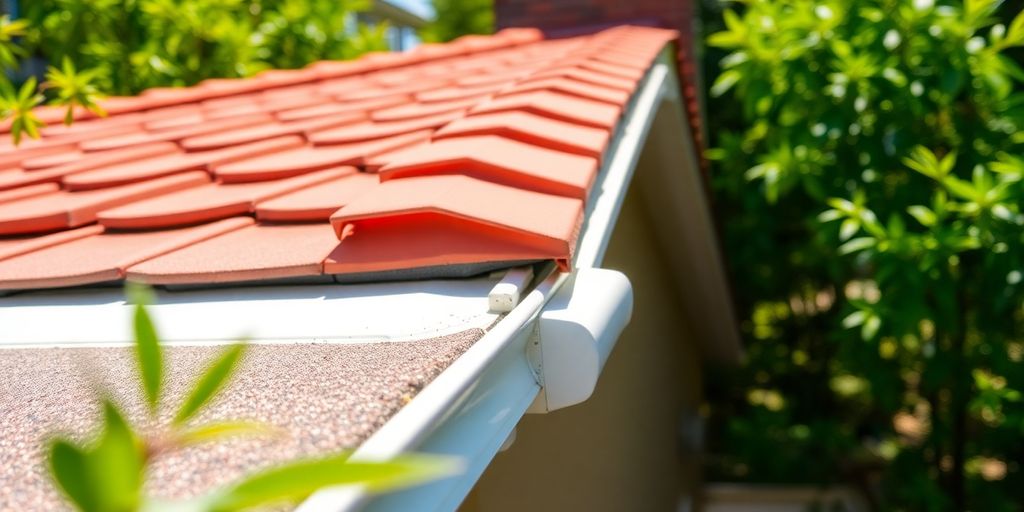
Taking care of your roof is crucial to keeping your home safe and dry. Regular roof inspections can catch small issues before they turn into big problems. Look for cracked, curled, or missing shingles, as these can let water seep in and cause damage to the structure beneath. If you spot any problems, it’s best to replace the damaged shingles right away. You can do this yourself if you’re comfortable on a ladder and have the right tools, but don’t hesitate to call a pro if you’re not sure. Also, keep an eye out for algae or moss growth, which can make shingles deteriorate faster.
Cleaning and Maintaining Gutters
Gutters play a big role in protecting your home from water damage. They channel rainwater away from your roof and foundation, preventing leaks and erosion. Make it a habit to clean your gutters at least twice a year, especially if you have trees nearby. Leaves and debris can clog them up, causing water to overflow and damage your home. If you’re tired of constant cleaning, consider installing gutter guards to keep the debris out. Use a sturdy ladder and gloves when cleaning, and always have someone nearby for safety.
Preventing Roof Leaks
Roof leaks can be a nightmare, leading to expensive repairs if not addressed quickly. To prevent leaks, ensure your roof is in good shape by checking for signs of wear and tear regularly. Pay special attention to areas around chimneys, vents, and skylights, as these are common spots for leaks. Applying a good sealant around these areas can help keep water out. Also, make sure your attic is well-ventilated to prevent moisture buildup, which can weaken your roof over time. Taking these preventative steps can save you a lot of trouble down the road.
Regular maintenance of your roof and gutters isn’t just about fixing problems as they come up—it’s about preventing them from happening in the first place. By keeping a close eye on these areas, you can protect your home and avoid costly repairs.
DIY Tips for Fixing Common Plumbing Issues
Unclogging Drains and Toilets
Unclogging drains and toilets can feel like a never-ending battle, but with some basic tools and patience, you can tackle it yourself. Start with a plunger, your first line of defense. For drains, a simple mix of baking soda and vinegar can work wonders. Pour a half-cup of baking soda followed by a cup of vinegar into the drain, let it fizz for a few minutes, and then flush with hot water.
If the plunger and baking soda trick don’t cut it, try a plumber’s snake. This handy tool can reach deep into pipes to dislodge stubborn clogs. Remember, patience is key. Don’t rush the process, and avoid using harsh chemical drain cleaners, as they can damage pipes over time.
Repairing Leaky Faucets and Pipes
Leaky faucets are not just annoying; they waste water and can lead to bigger problems. First, turn off the water supply to the affected area. Identify the type of faucet—compression, ball, cartridge, or ceramic disk—since repair methods vary.
- Compression faucets: Replace the washer inside the valve.
- Ball faucets: Often need a replacement kit due to their complexity.
- Cartridge faucets: Usually require a new cartridge.
- Ceramic disk faucets: Check for worn rubber seals.
For pipes, check for visible leaks and tighten any loose connections. If a pipe is cracked, you might need to replace the section or use a pipe repair kit for a temporary fix.
Replacing Showerheads and Fixtures
Replacing a showerhead or fixture is one of the easiest plumbing tasks you can do. Start by unscrewing the old showerhead using a wrench if it’s tight. Clean the threads on the shower arm and wrap them with plumber’s tape to ensure a good seal.
Simply screw on the new showerhead by hand, then tighten it slightly with a wrench. Be careful not to overtighten, as this can damage the fixture. For other fixtures, like faucets, follow the same steps, ensuring all connections are secure to prevent leaks.
Getting hands-on with plumbing can be intimidating, but remember, tackling these tasks yourself not only saves money but also gives you a better understanding of your home’s plumbing system. Just take it one step at a time, and don’t hesitate to call a professional if things get too tricky.
Enhancing Home Safety Through Electrical Repairs
Identifying Electrical Hazards
When it comes to home safety, understanding electrical hazards is crucial. Start by regularly checking your home for worn or frayed wires, which can lead to dangerous situations. Look for discoloration or a burning smell around outlets—these are warning signs that need immediate attention. Here’s a simple checklist to help you:
- Inspect all visible wiring for damage.
- Test circuit breakers monthly to ensure they function correctly.
- Avoid overloading outlets with too many devices.
Using this homeowners guide to conduct regular inspections can prevent potential hazards.
Replacing Faulty Outlets and Switches
Replacing faulty outlets and switches is a straightforward task that can greatly improve your home’s safety. First, always turn off the power at the circuit breaker before starting any work. Use a voltage tester to double-check that the power is off. Here’s how you can replace an outlet:
- Remove the faceplate and unscrew the outlet from the wall.
- Take note of how the wires are connected before removing them.
- Connect the wires to the new outlet, ensuring they are tight and secure.
- Screw the new outlet back into place and replace the faceplate.
- Turn the power back on and test the outlet.
Upgrading Home Lighting Systems
Upgrading your lighting system not only enhances the aesthetics of your home but can also improve energy efficiency. Consider switching to LED bulbs, which use less energy and last longer than traditional bulbs. When upgrading, ensure all fixtures are compatible with your new bulbs. Here’s a quick guide:
- Check compatibility of fixtures before purchasing new bulbs.
- Consider smart lighting options for greater control and energy savings.
- Always follow the manufacturer’s instructions for installation.
Regular maintenance and upgrades not only keep your home safe but also improve its comfort and efficiency. Tackle these tasks routinely to avoid bigger issues down the line.
Maintaining Outdoor Structures for Longevity
Repairing Decks and Patios
Keeping your deck or patio in good shape isn’t just about aesthetics; it’s about safety too. Regular inspections are key. Look for loose boards, nails sticking out, or any signs of rot. If you spot any issues, tackle them right away. For wooden decks, a fresh coat of sealant every couple of years can work wonders, protecting against the elements and preventing moisture damage.
- Inspect regularly: Check for loose boards or nails.
- Seal wooden decks: Apply sealant every 2-3 years.
- Repair promptly: Address any signs of rot or damage immediately.
Maintaining Fences and Gates
Fences and gates are the first line of defense for your property. Start by walking the perimeter and checking for any leaning sections or broken boards. Tighten loose screws and replace any damaged panels. For metal fences, keep an eye out for rust and treat it with rust-resistant paint. Regular maintenance can save you from bigger headaches down the road.
- Check for damage: Look for leaning sections or broken boards.
- Tighten and replace: Fix loose screws and replace damaged panels.
- Rust treatment: Use rust-resistant paint on metal fences.
Protecting Outdoor Furniture
Outdoor furniture is an investment worth protecting. When not in use, cover your furniture or store it in a shed. If you live in a place with harsh winters, consider bringing cushions indoors to prevent mold and mildew. Regularly clean your furniture with mild soap and water to keep it looking fresh. Investing in high-quality covers can also extend the lifespan of your furniture.
- Use covers: Protect furniture when not in use.
- Store cushions indoors: Prevent mold and mildew during winter.
- Clean regularly: Use mild soap and water for maintenance.
Keeping up with these tasks might seem like a hassle, but it’s worth it. A little effort now can save you time and money later, plus it keeps your outdoor spaces looking great.
Cost-Effective Painting and Wall Repair Techniques
Patching and Painting Walls
Fixing up your walls doesn’t have to break the bank. A quick patch and paint job can breathe new life into any room. Start by filling any holes or cracks with spackle. Once it’s dry, sand it down until smooth. Next, apply a primer to ensure your paint adheres properly. For a seamless finish, make sure to use a roller for larger areas and a brush for corners and edges. If you’re looking for a budget-friendly option, consider using the same color for walls and trim. This can save you money on paint and give your space a cohesive look.
Choosing the Right Paint for Your Home
Picking the right paint can be tricky. You’ll want to consider factors like durability, finish, and color. Satin and eggshell finishes are great for living areas, offering a nice sheen without being too shiny. For bathrooms and kitchens, opt for semi-gloss or gloss finishes as they’re easier to clean. When selecting colors, think about the mood you want to create. Light colors can make a space feel larger, while darker tones add coziness.
Techniques for a Professional Finish
Getting that professional look takes a bit of practice, but it’s totally doable. Start by taping off areas you don’t want to paint, like baseboards and windows. Use long, even strokes with your roller, and don’t overload it with paint to avoid drips. For a smooth finish, roll in a "W" pattern. Finally, remove the tape while the paint is still a bit wet to prevent peeling.
Painting is one of those tasks that can seem daunting at first, but once you get the hang of it, it’s incredibly rewarding. Plus, doing it yourself can save you a ton of money compared to hiring a pro.
Preventative Maintenance to Avoid Future Home Damage
Regular Inspection and Maintenance Checklist
Keeping up with regular inspections can save you a ton of headaches down the road. Start with a simple checklist:
- Roof and Gutters: Check these twice a year. Look for missing shingles and clean out leaves and debris from gutters. This helps prevent water damage and even ice formation in the winter.
- Windows and Doors: Inspect seals and caulking around windows and doors. Fixing drafts can save on energy bills and keep your home cozy.
- Plumbing: Look for leaks under sinks and behind appliances. A small drip can turn into a big problem if ignored.
Seasonal Home Maintenance Tips
Different seasons bring different challenges. Here’s what to focus on:
- Spring: Perfect time for a deep clean. Check your roof for any winter damage and clean out gutters.
- Summer: Inspect your deck or patio. Make sure it’s safe and ready for BBQ season.
- Fall: Time to prepare for the cold. Clean out gutters again, and make sure your heating system is ready.
- Winter: Keep an eye on pipes to prevent freezing. Open hose bibs and turn off water inside to avoid burst pipes.
Long-Term Benefits of Preventative Care
Investing a little time regularly in maintenance can save you big bucks in the long run. Keeping up with small repairs prevents them from turning into costly projects. Plus, it extends the life of your home’s components like roofing, windows, and appliances.
Regular preventative maintenance, such as keeping gutters clear of debris, is essential for home safety. It helps prevent water damage and ice formation in winter, reducing the risk of slips and falls.
By staying on top of these tasks, not only do you protect your home, but you also add to its value. A well-maintained home is more appealing to buyers if you ever decide to sell. So, grab that checklist and get started!
To keep your home safe and sound, regular maintenance is key. By checking for leaks, cleaning gutters, and inspecting your roof, you can prevent costly repairs down the line. Don’t wait for problems to arise—take action now! Visit our website to learn more about how we can help you protect your home today!
Wrapping Up Your Home Repair Journey
So, there you have it! Tackling home repairs might seem like a mountain at first, but with the right guide and a bit of patience, it’s totally doable. Remember, it’s all about taking things one step at a time. Whether you’re fixing a leaky faucet or patching up drywall, every little bit helps in keeping your home in tip-top shape. And hey, don’t forget about those preventative measures—they’re your best friend in avoiding bigger headaches down the road. So grab your tools, roll up those sleeves, and get started. Your home will thank you for it!
Frequently Asked Questions
Why is regular home maintenance important?
Regular maintenance keeps your home safe and comfortable. It helps catch small problems before they become big, expensive ones.
Can I do home repairs myself, or should I hire a professional?
It depends on your skill level and the complexity of the repair. Simple tasks like fixing a leaky faucet can be DIY, but more complex jobs like electrical work might need a pro.
What are some essential tools for home repairs?
Basic tools include a hammer, screwdriver, tape measure, pliers, and a utility knife. These tools can help with most simple repairs.
How can I prevent mold after water damage?
Dry the area quickly, use fans and dehumidifiers, and clean with mold-killing products. It’s important to act fast to stop mold from growing.
What should I do if my roof is leaking?
First, try to stop the leak with a tarp or bucket. Then, inspect the roof for damage like missing shingles and contact a professional if needed.
How often should I inspect my home for damage?
You should check your home every season. Regular inspections help catch issues early, saving you time and money.