
Owning a home means taking on the good, the bad, and the broken. From fixing a leaky faucet to patching up a hole in the wall, learning how to handle in home repairs can save you time, money, and a lot of stress. If you’ve ever felt overwhelmed by a repair project, you’re not alone. The good news is, with a bit of knowledge and the right tools, you can tackle most common issues yourself. This guide will walk you through practical tips and skills every homeowner should know.
Key Takeaways
- Having a well-stocked toolkit is the first step to handling repairs efficiently.
- Basic plumbing fixes, like stopping a faucet leak, can prevent bigger problems later.
- Understanding your home’s electrical panel can help you safely manage simple electrical tasks.
- Learning how to patch drywall or repair trim keeps your home looking sharp.
- Regular maintenance, like checking gutters and HVAC systems, helps avoid costly repairs.
Essential Tools for Tackling In Home Repairs
Must-Have Hand Tools for Every Homeowner
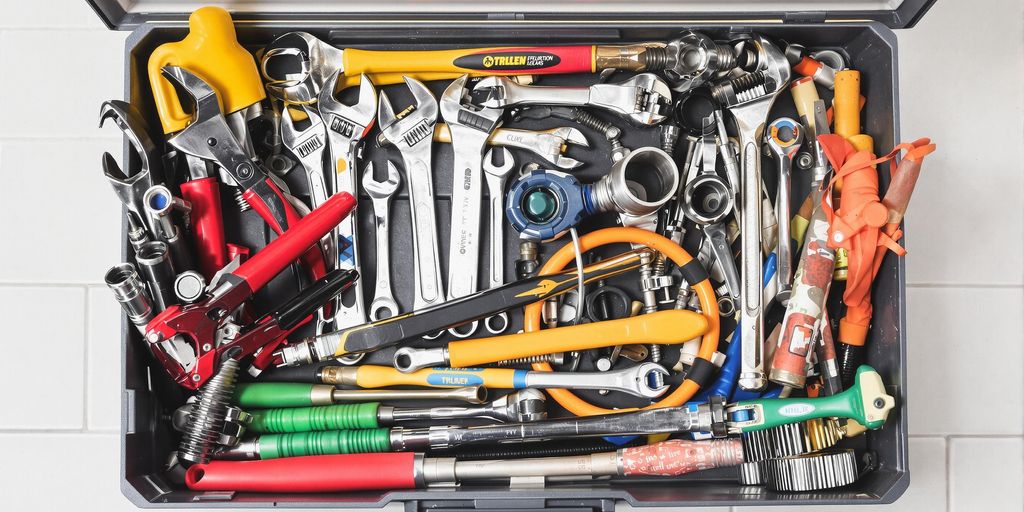
Starting with the basics, every homeowner needs a solid foundation of hand tools. A claw hammer, for instance, is indispensable for driving and removing nails. Pair it with a set of screwdrivers—both flathead and Phillips head—and you’ll be ready for tasks like tightening cabinet handles or assembling furniture.
Other essentials include:
- Adjustable wrench: Perfect for tackling various nut and bolt sizes.
- Tape measure: A 25-foot version is ideal for measuring spaces, whether you’re hanging shelves or cutting materials.
- Utility knife: Great for precise cuts on everything from drywall to carpeting.
Advanced Tools to Simplify Repairs
As you gain confidence, investing in advanced tools can make your projects faster and easier. A cordless power drill is a game-changer, especially when equipped with a rechargeable battery and a variety of drill bits. For those tackling electrical work, a voltage tester is a small but vital tool to ensure circuits are safe to work on.
Other advanced picks include:
- A multi-bit screwdriver for versatility.
- A ratchet and socket set for stubborn fasteners.
- A level to keep your projects perfectly straight.
Organizing and Maintaining Your Toolkit
Owning tools is only half the battle—keeping them organized and in good shape is just as important. Start by dedicating a storage area, like a toolbox or pegboard. This keeps everything accessible and prevents you from losing items.
Maintenance tips:
- Wipe down tools after use to prevent rust.
- Sharpen blades regularly for clean, accurate cuts.
- Store tools in a dry area to avoid moisture damage.
Having the right tools isn’t just convenient—it’s empowering. With a well-maintained toolkit, you’ll feel ready to handle almost any repair that comes your way.
Mastering Basic Plumbing Repairs at Home
Fixing Common Faucet Leaks
A leaky faucet might seem minor, but it can waste gallons of water over time. Fixing it is often simpler than you’d think. Start by turning off the water supply under the sink. Then, disassemble the faucet handle using a screwdriver. Check the washer or cartridge inside—these are usually the culprits. Replace any worn-out parts and reassemble. If done right, your faucet should work like new, and you’ll save on water bills.
Unclogging Drains Without Harsh Chemicals
Clogged drains are a common headache, but you don’t need harsh chemicals to fix them. Try these steps instead:
- Use a plunger to create suction and dislodge the blockage.
- For tougher clogs, grab a drain snake. Insert it into the drain, twist, and pull out debris.
- Flush the drain with boiling water to clear any remaining residue.
These methods are effective, eco-friendly, and safe for your pipes.
Replacing Toilet Components Safely
A running or malfunctioning toilet is not just annoying—it wastes water too. Often, the solution lies in replacing simple components like the flapper or fill valve. Here’s a quick guide:
- Turn off the water supply to the toilet.
- Drain the tank by flushing and soaking up any remaining water with a sponge.
- Remove the old flapper or fill valve and replace it with a new one. These parts are affordable and available at most hardware stores.
Taking a little time to learn these fixes can save you from costly plumber visits. If you’re ever unsure, remember this guide can help with more detailed instructions and advice.
Electrical Repairs Every Homeowner Should Know
Understanding Your Home’s Electrical Panel
Your electrical panel is the heart of your home’s power system. It’s where electricity from the grid gets distributed to different areas of your house. Knowing how to safely reset a tripped breaker can save you from unnecessary outages. Here’s how you can approach it:
- Locate the panel, usually in a basement, garage, or utility room.
- Identify the tripped breaker—it’ll be in a neutral position, not fully on or off.
- Flip it to the "off" position first, then back to "on."
If a breaker trips repeatedly, it might indicate an overloaded circuit or a faulty appliance. In such cases, it’s best to consult a professional.
Replacing Light Fixtures Safely
Switching out a light fixture is an easy way to refresh a room, but safety comes first. Always turn off the power at the breaker before starting. Here’s a quick guide:
- Unscrew and remove the old fixture.
- Disconnect the wires, noting which ones are connected.
- Attach the new fixture’s wires, matching like-for-like (black to black, white to white, etc.).
- Secure the fixture and turn the power back on to test it.
Replacing light fixtures, like this homeowner-friendly task, can be done in under an hour and makes a noticeable difference.
Using a Voltage Tester for Basic Repairs
A voltage tester is a small but mighty tool that keeps you safe during electrical work. Before touching any wires, use it to confirm the power is off. Here’s how:
- Turn off the circuit you’ll be working on.
- Place the tester near the wires—if it lights up or beeps, the circuit is still live.
- Only proceed once the tester confirms no voltage is present.
A voltage tester is an inexpensive investment that can prevent serious accidents. It’s a must-have for any DIYer tackling electrical repairs.
When working with electricity, always prioritize safety. If something feels beyond your knowledge or comfort level, don’t hesitate to call in a licensed electrician.
Wall and Surface Repairs Made Simple
Patching Drywall Holes and Cracks
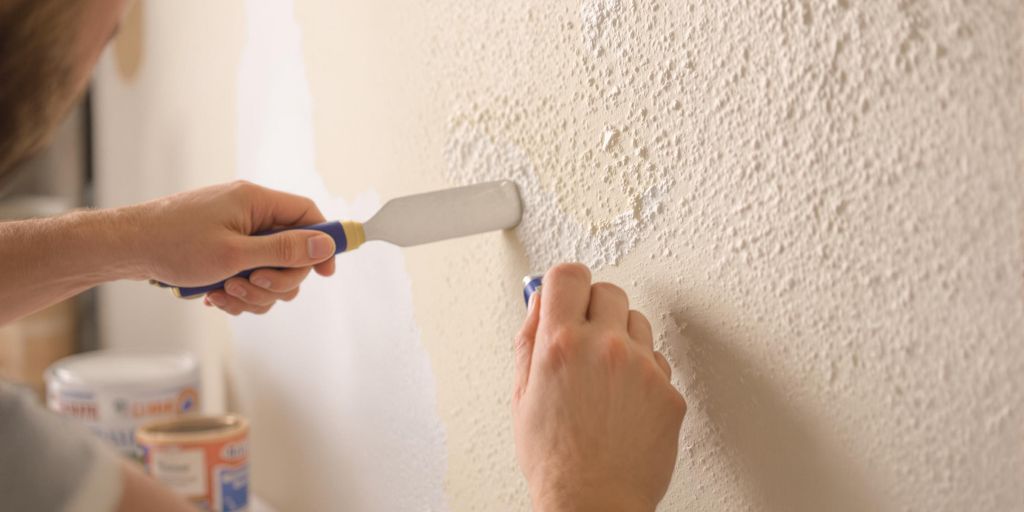
Fixing drywall might sound tricky, but it’s actually pretty straightforward. Start by assessing the damage—small holes require spackle, but larger ones might need a drywall patch. Always clean the area first to remove loose debris. For bigger holes, a mesh patch can provide that extra support. Apply your spackle or joint compound in thin layers, smoothing it out as you go. Once it’s dry, sand it down to blend seamlessly with the wall. A little patience here goes a long way to getting a flawless finish. If you’re short on time or expertise, consider professional services like Ruach Home Services for efficient drywall installation and finishing.
Painting Tips for a Professional Finish
Painting is more than just rolling color onto a wall. Prep is key. Clean the surface and repair any imperfections before you even think about opening that paint can. Use painter’s tape to protect edges and ensure clean lines. Opt for a primer if you’re covering dark colors or painting a porous surface. When applying paint, use long, even strokes and avoid overloading your brush or roller. Two thin coats are better than one thick one. Trust me, this makes all the difference for a polished, professional look.
Repairing Damaged Baseboards and Trim
Baseboards and trim take a beating over time. Whether it’s scuffs, chips, or cracks, repairs can refresh your space. For minor damage, wood filler is your best friend. Smooth it into the damaged area, let it dry, and sand it flush. For more significant issues, you may need to replace a section. Measure carefully and use a miter saw for precise cuts. Once repaired, a fresh coat of paint or stain will make your trim look brand new.
Preventative Maintenance for a Trouble-Free Home
Regular HVAC System Checks
Your HVAC system is the heart of your home’s climate control. Keeping it in top shape can save you money and headaches. Start by changing air filters every 1-3 months, depending on usage and household conditions like pets or allergies. Also, check the outdoor unit for debris buildup—leaves, dirt, and even small branches can block airflow. Schedule a professional tune-up at least once a year to ensure the system runs efficiently.
Inspecting and Cleaning Gutters
Gutters are easy to overlook, but they play a critical role in directing water away from your home. Clogged gutters can lead to water damage, mold, and even foundation issues. Clean them at least twice a year—once in the spring and again in the fall. Use a small plastic scoop or your hands (with gloves) to remove debris, and rinse with a garden hose. While you’re at it, inspect for leaks or sagging sections that might need repair.
Identifying Early Signs of Wear and Tear
Don’t wait for something to break before you fix it. A quick walk-through of your home every few months can help you spot potential issues. Look for cracks in walls, peeling paint, or water stains on ceilings. These could indicate deeper problems like structural issues or leaks. Check appliances for unusual noises or reduced performance, and replace worn-out parts promptly. Catching these small signs early can prevent costly repairs down the road.
A little effort now can save you big-time stress later. Preventative maintenance isn’t just about fixing things—it’s about keeping your home safe, functional, and comfortable.
DIY Carpentry Skills for Home Repairs
Building and Repairing Shelves
If you’ve ever struggled with clutter or lack of storage, knowing how to build or repair shelves can be a game-changer. Start by measuring the space where the shelf will go—accuracy is key here. Once you have your measurements, choose the right material. While wood is the most common, you can also experiment with metal brackets or even reclaimed wood for a rustic look. Assemble using screws and a power drill, ensuring everything is level with a spirit level. If you’re repairing a shelf, check for loose screws or warped boards and replace them as needed.
Fixing Loose Furniture Joints
Loose furniture joints can make a wobbly chair or table downright annoying. First, identify the weak spots—most often, it’s the legs or connecting braces. Use wood glue to secure the joints, and clamp the pieces together until the glue dries. For added stability, you might want to drill a small pilot hole and insert a screw or dowel. Regularly tightening screws and inspecting your furniture can prevent these issues from cropping up in the first place.
Using Power Tools Safely
Power tools are incredibly useful but can be dangerous if not handled properly. Always read the manufacturer’s instructions before using any tool. Wear safety gear like goggles, gloves, and ear protection. Keep your workspace clean and free of clutter to avoid accidents. Additionally, make a habit of inspecting your tools for wear and tear—dull blades or frayed cords can be hazardous. Remember, a little caution goes a long way when working with power tools.
Eco-Friendly Approaches to In Home Repairs
Choosing Sustainable Materials
When you’re tackling home repairs, consider using sustainable materials to reduce your environmental impact. Opt for reclaimed wood, bamboo flooring, or recycled glass tiles. These materials not only look great but also help minimize waste. Look for products with certifications like FSC (Forest Stewardship Council) to ensure they’re sourced responsibly.
Reducing Waste During Repairs
A lot of waste can pile up during repair projects, but it doesn’t have to. Here are a few ways to cut down on it:
- Plan ahead: Measure carefully and buy only what you need.
- Reuse materials: Salvage usable items from old projects, like screws or wood.
- Recycle: Separate materials like metal, wood, and plastic for proper recycling.
By being mindful, you’ll save money and reduce landfill contributions.
Energy-Efficient Upgrades for Your Home
One of the easiest ways to make your home greener is by upgrading to energy-efficient systems. Consider:
- Installing LED light bulbs—they last longer and use less energy.
- Sealing windows and doors to prevent heat loss.
- Upgrading to Energy Star-rated appliances for better performance and lower utility bills.
Small, eco-friendly changes in your home can make a big difference over time. Not only will you reduce your carbon footprint, but you’ll likely see savings on your energy bills too.
For accessible restoration and remodeling services that align with these eco-friendly principles, check out Ruach Home Services. Their expertise ensures quality results while keeping sustainability in mind.
When it comes to fixing things at home, there are many ways to be kind to our planet. Using natural materials and eco-friendly tools can make a big difference. For example, instead of harsh chemicals, try using vinegar or baking soda for cleaning. These simple changes not only help the Earth but also keep your home safe. Want to learn more about how to make your home repairs greener? Visit our website for tips and tricks!
Wrapping It Up
Taking care of your home doesn’t have to feel like an impossible task. With a little patience, the right tools, and a willingness to learn, you can handle many common repairs on your own. Sure, there might be a few bumps along the way—maybe a crooked shelf or a faucet that still drips a little—but that’s all part of the process. The more you practice, the more confident you’ll get. And hey, when in doubt, there’s no shame in calling in a pro. At the end of the day, it’s all about keeping your home safe, functional, and a place you’re proud to call your own.
Frequently Asked Questions
What are the essential tools every homeowner should have?
Every homeowner should have basic tools like a hammer, screwdrivers, pliers, and a tape measure. Advanced tools such as a power drill, voltage tester, and a utility knife can also be very helpful for more complex tasks.
How can I fix a leaky faucet on my own?
Start by turning off the water supply under the sink. Remove the faucet handle with a screwdriver, replace the worn-out washer or cartridge, and reassemble the faucet. Turn the water back on to check if the leak is resolved.
What’s the safest way to unclog a drain without chemicals?
You can use a plunger to loosen the clog or a drain snake to remove debris. Pouring boiling water down the drain afterward can help clear any remaining residue.
How do I patch a hole in drywall?
For small holes, use spackle or a patch kit. Apply the spackle with a putty knife, let it dry, and then sand it smooth. For larger holes, you may need to cut a piece of drywall to fit the hole and secure it with drywall tape and joint compound.
What should I know before replacing a light fixture?
Always turn off the power at the circuit breaker before starting. Use a voltage tester to ensure no electricity is flowing. Follow the fixture’s instructions carefully, and secure all wires properly before turning the power back on.
How can I make my home repairs more eco-friendly?
Choose sustainable materials like reclaimed wood, reduce waste by reusing or recycling old materials, and consider energy-efficient upgrades like LED lighting and low-flow plumbing fixtures.